This post describes how to transfer/compare data between 2 databases. Before I start, to transfer data using Visual Studio you need to have:
Most articles tend to leave this part out, this is a pain because you will open up your Visual Studio and wonder where the option is. Other versions of Visual Studio (2012, professional) do not have this tool installed.
If you want to simply transfer data between databases, then this is the easiest way. It beats the import/export way because you do not need to install separate tools like SQL Server Express or third party software, it is all inside Visual Studio.
If you already have the same tables on each database, then skip the Transferring Table Schemas part and go to Transferring Data and Records part.
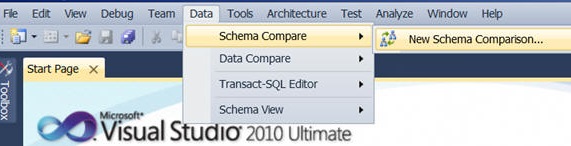
Step 1: New Schema Comparison
After opening Visual Studio 2010, on the top tool bar go to the top tool bar and go to Data>Schema Compare>New Schema Comparison
Step 2: Enter the database information
You should get a pop up like this. Here you can choose the databases to compare if they are already saved, if not then click on new connection and add it in.
Source Schema: the database you want to get the tables from
Target Schema: the database you want to transfer the tables to
After pressing OK, wait until the two databases get compared, there should be a process bar.
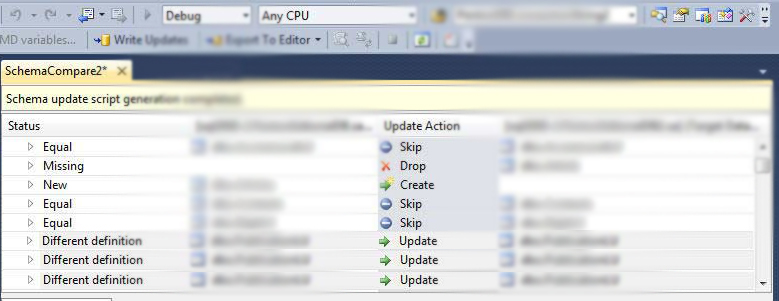
Step 3: Schema Compare
You can compare the two databases and decide whether or not you want to skip/update/create/drop the table when updating the target database.
When you are ready, press the Write Updates button and the target schema will be updated.
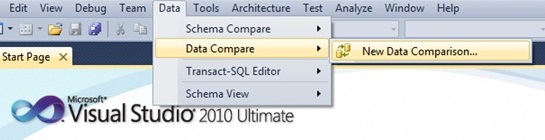
Step 1: New Data Comparison
After opening Visual Studio 2010, on the top tool bar go to the top tool bar and go to Data>Data Compare>New Data Comparison
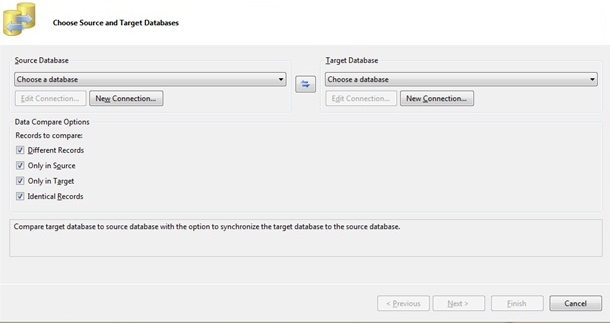
Step 2: Enter Database Information
You should get a pop up like this. Here you can choose the databases to compare if they are already saved, if not then click on new connection and add it in.
Source Schema: the database you want to get the tables from
Target Schema: the database you want to transfer the tables to
Select the options you want to compare, and then either click next or finish.
Next will give you a screen to select which tables and fields you want to compare.
Finish will compare every table.
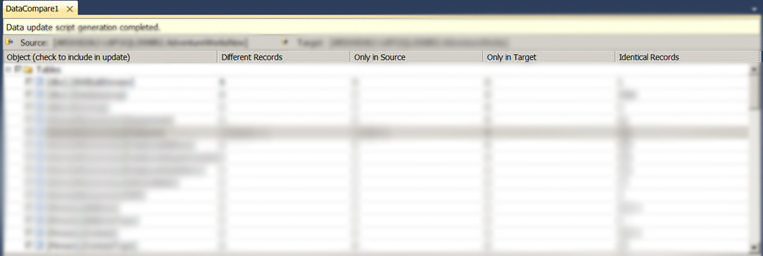
Step 3: Data Compare
You can compare the two databases and decide whether or not you want to transfer the table data.
When you are ready, press the Write Updates button and the target database will be updated with the records you selected.